How to Baby Proof a Wine Rack often becomes a top concern when you see your child’s eyes light up at those shiny bottles. A falling rack might lead to broken glass, spills, or even injuries.
Parents want a baby safe, child proof, and hazard free setup. The trick is to use secure design features and basic safety tips to prevent a scary accident.
Now, the question is how to baby proof a wine rack?
Use a wine rack anchor or straps to fix the rack to a sturdy wall. Add corner guards or a wine rack barrier to stop tiny fingers from grabbing bottles. Place locks or latches on lower shelves. Keep heavier bottles on top to limit a toddler’s reach. This setup helps keep your rack baby safe and hazard free.
This article shows How to Baby Proof a Wine Rack with clear steps, simple tools, and a few extra ideas for a home safety plan.
I’ll talk about baby proofing wine rack methods, including ways to get a secure wine rack and handle day-to-day child safety.
I’ll also share wine rack tips for safe bottle placement and highlight easy projects for a stable design.
By the end, you’ll have practical options that help keep your child safe and your wine bottles right where you left them.
Before jumping into the content, you can follow this key takeaway.
3 Key Takeaways
- Child Safety Wine Rack steps prevent tip-overs and lower the chance of broken glass.
- Baby Proofing Wine Rack tools, like corner guards and strong straps, help create a secure wine rack in no time.
- Planning ahead reduces accidents and protects little ones while keeping your bottles safe.
Why Baby-Proofing a Wine Rack Matters
Wine racks pose hidden risks for children. A playful toddler might try climbing the rack to grab a colorful bottle. A sudden pull can topple it, which is dangerous.
Experts at the U.S. Consumer Product Safety Commission (CPSC) have identified furniture and rack tip-overs as significant hazards that can lead to serious injuries and fatalities among children. Between 2000 and 2018, there were 459 reported tip-over-related deaths involving children 17 years old and younger, with nearly 80% of these fatalities involving children 5 years old and younger.
Bottles are heavy and made of glass, so they’re more than simple décor. A bump can break a bottle and leave shards on the floor.
Small children are also speedy little tasters, and wine is not for children. If you’ve already been considering childproofing your TV stand or how to baby proof a coffee table, you can use similar logic for your wine rack. Safety wine rack steps for the home help prevent accidents before they occur.
A few easy fixes help. A secure anchor keeps the rack from moving if your child tugs on it. Corner pads soften sharp edges.
A wine rack barrier or net covers open areas so little arms can’t reach inside. These changes work for both small racks and large ones. It’s much safer to create a child safe spot in your dining area or kitchen than to deal with accidents later.
Parents sometimes worry about messing up their décor. Thankfully, new child safety products blend in well. just like when using discreet child safety locks for cabinets or media units. Many corner guards are see-through, and anchors usually hide behind the rack.
The final goal is a hazard free home that still looks good. When you follow these safety tips, you can sip your favorite drink without fretting about your toddler’s next move.
Gathering Tools for a DIY Wine Rack Childproofing
Before you start babyproofing your wine rack, gather the key tools and supplies. What’s more, preparing in advance makes the work easier, faster, and safer. Young children may not understand that a wine rack can be dangerous, especially if it has sharp edges, heavy bottles, or instability.
In a fairly straightforward list of what you will need and what each one does:
Corner Guards
Corner guards are soft coverings that slip over the wine rack’s sharp edges. They prevent children from being injured by falls or collisions with furniture. This is particularly helpful with racks at a child’s head height.
Furniture Straps (Anti-Tip Straps)
These straps are sturdy and hold the wine rack to the wall. They prevent the rack from tipping over if a child pulls on it or attempts to use it as a ladder. This is why the saddle rack is so much safer and causes fewer serious accidents.
Baby Locks or Latches
Secure locks or catches on any doors or shelves that open onto the wine rack. They prevent small hands from yanking out heavy wine bottles or crawling in. This minimizes the risk of a bottle dropping or breaking.
Non-Slip Pads
Non-slip pads adhere to the underside of the legs or the base of the wine rack. They also keep the rack from slipping on floors stained or finished — or at least not carpeted — in materials like tile or wood. This causes the rack to be less stable and difficult to move.
Brace Style: Metal Brackets or Special Straps
You may require metal brackets or heavy-duty straps, depending on the material your wine rack is made of. These will help to secure the rack firmly to the wall. A secure attachment is crucial to ensure that the rack won’t slide or topple.
Safety Netting or Barriers
This is the mesh or plastic that you pull down to cover the front or sides of open wine racks. Prevents children from reaching in and pulling bottles out. This is an excellent way to do it, provided you have exposed shelves or spaces between bars.
Level
A level assists you while you are installing or repositioning the wine rack to ensure it is level. Straight racks are less likely to wobble or tip over. It also makes your setup look clean and organized.
Drill and Screws
When securing straps or brackets to the wall, screws are drilled in. Screws also make the rack more reliable than glue or tape. A corded drill also speeds up the job and makes it very easy.
Measuring Tape
Find the appropriate spots on the wall using a measuring tape, particularly where the wall studs are located. Studs are the solid components behind the wall to which you must screw or attach things. Measuring ensures that everything is set up correctly and safely.

How to Baby Proof a Wine Rack: Step-by-Step
Step 1: Anchor The Wine Rack With A Furniture Anchor
Why: Prevents the wine rack from falling over if a child tugs on it or attempts to climb on it.
How to Do It:
You can purchase a good furniture anchor kit at a hardware store or online (look for “anti-tip straps” or “furniture anchors”). These typically involve brackets, screws, and heavy-duty nylon straps.
Locate a wall stud with the help of a stud finder. This is key — screwing into drywall alone won’t be strong enough.
Indicate where the anchor should be placed on the wall and the wine rack. You want to pick an inconspicuous spot, preferably behind the top shelf or back panel.
Use a drill to bore pilot holes for the wall stud and into the back of the wine rack.
Screw brackets into place (one into the stud, one into the wine rack) using the provided hardware.
Install the straps and tighten the rack to the wall. Ensure that the rack will not be able to tilt into the void.

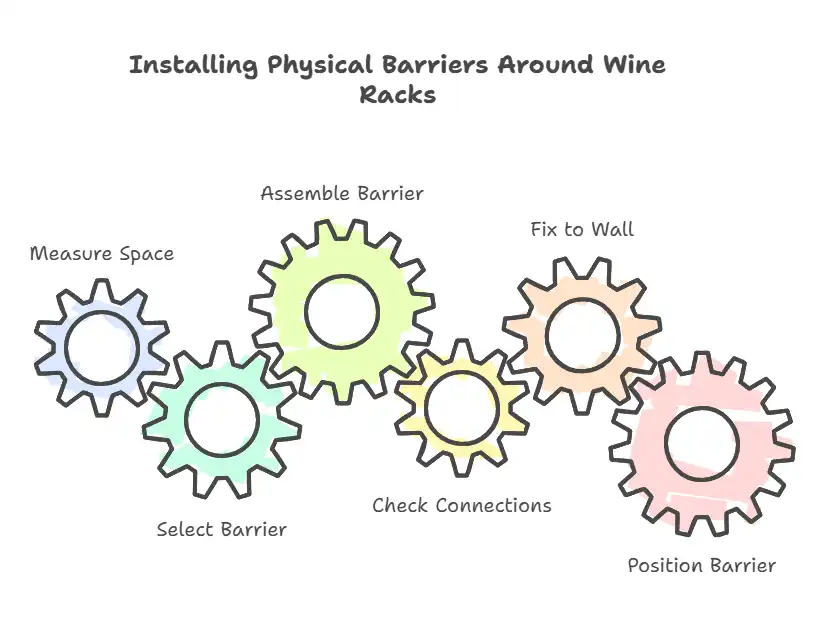
STEP 2: INSTALL PHYSICAL BARRIERS AROUND WINE RACKS
Why: Keeps your child out of reach of wine bottles, which can be dangerous if they break or if your little one sneaks a few sips.
How to Do It:
Measure the space surrounding the wine rack to determine the size of the barrier you’ll require.
Select a freestanding baby gate or safety fence that wraps around the rack. Find gates that are labeled as “play yard” or “pet gate” — these are often suitable for what I like to call “containing” an area.
Assemble the barrier according to the manufacturer’s instructions. Check that all connections are tight.
Fix the gate or fence to the wall, if possible, so that your child cannot push it to one side.
Place the barricade 1-2 feet from the wine rack to keep little arms from poking through.
Step 3: Get Wine Bottles Out of the Way or Move the Bottles You Can Reach
Why: A curious toddler may still be able to reach through the barrier or knock things over.
How to Do It:
Find all the bottles of wine in the bottom half of the wine rack (below 3 feet).
In such a scenario, their bottles should be removed and stored in a childproof kitchen cabinet or moved to a higher position on the rack.
If your wine rack is decorative and not completely stocked, replace some of the lower.

Step 4 – Padded Sharp Edges And Corners
Why: It protects you from injury by preventing your head from hitting the edges of the rack during a fall.
How to Do It:
Check the wine rack for any sharp corners or edges (metal, wood, or glass finishes are more likely to be a problem).
Buy baby-proofing kits online or in-store, then purchase corner guards or edge padding (made of foam or silicone)
Wipe down the wine rack surface with rubbing alcohol to ensure the adhesive sticks.
Remove the synthetic backing and press the padding firmly against the edges or corners.
Allow to stand undisturbed for at least 1 hour so that all the adhesive cures.

Step 5: Consider Placing a Locking Wine Rack Cover (Optional)
Why: It offers an additional measure of security if you’re not planning to move bottles or erect a physical barrier.
How to Do It:
Find a clear acrylic or mesh wine rack cover that fits your rack’s size. Some companies provide custom choices.
Add hinges and a lockable clasp on the front of the rack so that adults can open the cover while children cannot.
Trim the cover to size with a utility knife or small saw (adhere to manufacturer instructions).
Mount with included brackets or adhesive fasteners that you can remove if desired. The lid opens easily for you but stays locked away from children.
")
Step 6: Educate and Supervise
Why: Physical barriers help, but it’s also important to teach your child about boundaries for long-term safety.
How to Do It:
Begin telling your child (as early as 1 year old) that the wine rack is not a toy and is off-limits.
Employ uniform verbal commands, such as “No touch,” and redirect their focus to a safe play spot.
Even after baby-proofing, continue to monitor your child in the area. The more family members involved in the safety-proofing, the lower the risk, but the risk is never zero.

Common Mistakes and How to Avoid Them
Plenty of parents rush to childproof. That’s when mistakes happen. One big error is leaving the rack freestanding and hoping it won’t budge. A strong toddler can topple it. A secure anchor with straps fixes this issue right away.
Another mistake is forgetting how high kids can reach. They grow fast, and soon that top shelf might be within arm’s length. Similar to adding balcony safety netting, baby-proofing is about planning ahead as your child grows and becomes more mobile. Consider a higher spot for the rack or keep real bottles up high.
Some folks pick cheap adhesives for corner guards or straps. These may peel off after a few days, especially on smooth metal. It’s better to pick strong hardware or anchors.
Also, ignoring routine checks can cause problems. Even a tight strap can loosen over time. A quick look each month helps keep your child safe plan in good shape.
Another common oversight is storing full bottles in low spots. Curious children might roll them around. That leads to broken glass or spilled wine.
A simple fix is to put empties below, or fill the bottom shelves with plastic items. This is a small step, but it creates a big difference.
It’s also easy to forget about edges on the rack. Some racks have metal corners that can cut or bruise a child. Corner guards solve this quickly, so try not to skip them.
Minor adjustments can spare you lots of stress. Take a moment to see if you’ve missed anything.
Add a safety barrier if you need it. That final glance can keep your child from a painful accident.
How to Baby Proof a Wine Fridge: What Every Parent Should Know
How to Baby Proof a Wine Rack matters for regular racks, but a wine fridge also poses risks. Glass doors, cool lights, and easy-to-open handles make it tempting for children.
A simple child lock designed for fridges can stop them from opening the door. There are plenty of options available, similar to those you’d use when learning how to child safety locks for drawers, cabinets, or even oven doors. That lock usually sticks on both sides and has a clip you can undo when you want to grab a bottle.
Placement is also key. If the fridge sits on the floor or within reach, moving it to a higher spot might help. Some people install it behind a cabinet door for an extra layer of child safety. When that’s not possible, a strong latch can be enough.
Glass doors are another concern. Some wine fridge doors are tempered glass, but accidents can still happen.
A thin film that’s made for windows can keep the door from shattering into small pieces. It won’t make the glass unbreakable, but it might hold it together if something slams into it. Add rubber bumpers or corner pads to limit the chance of sharp edges cutting your child.
A quick test after setup helps. Give the door a gentle pull to see if your child could yank it open. If it holds up well, you can relax.
Now you can keep your wine inside a fridge without worrying that your toddler might pop the door open and break a bottle. It’s a simple step, and it pairs well with the other wine rack safety ideas.
Frequently Asked Questions
Below are some common questions about childproofing different parts of the home. These also apply when you add baby proofing wine rack plans into your routine.
How to baby proof shelving?
Bolt or strap the unit to a wall stud. Move heavy objects to lower shelves so they don’t crush a child if pulled down. Corner guards help on sharp edges. A small latch keeps doors shut.
How to secure a wine rack to a wall?
Use a stud finder to locate a solid spot. Attach the rack with brackets or straps. Check for a firm grip so it becomes a fixed wine rack. Test for any wobble once you’re done.
How to baby proof cabinet handles?
Pick childproof latches that loop around the handles or a magnetic lock inside the cabinet. This stops kids from swinging open doors and rummaging inside.
Conclusion
How to Baby Proof a Wine Rack might sound complicated, but you can do it with simple tools. A wine rack anchor, straps, or netting add big safety gains.
Corner guards keep heads and hands safe from sharp edges. You can also move heavy bottles up high to cut down on risky situations.
These ideas fit into a wider home safety plan, so glance around your space and see if other furniture needs a secure installation too.
I’ve done this in my own home, and it eased my worries. A few screw holes and rubber guards saved me from more than one close call.
It’s worth doing now instead of regretting it later. You’ll feel proud that you protected your child while keeping your wine rack in one piece.